Showing posts with label recipe. Show all posts

Saturday, May 9, 2015

Madeleines

I spotted RM5.30 (thanks for increasing your prices after GST) Madeleine moulds at Daiso and could have literally whooped for joy as I've been wanting to try out Madeleines for a long time. Think of Madeleines as French kuih buloh with their buttery taste encased in a bite sized shell shaped sponge cake.


This recipe was really easy and makes precisely 10 Madeleines in the Daiso pan. Since they were a hit with Hubs and Bubs, I'm thinking of getting an additional pan and doubling the recipe for more of these beautifully flavoured gems.

Ingredients:
2 eggs  
3/4 teaspoon vanilla extract  
1/8 teaspoon salt  
1/3 cup white sugar  
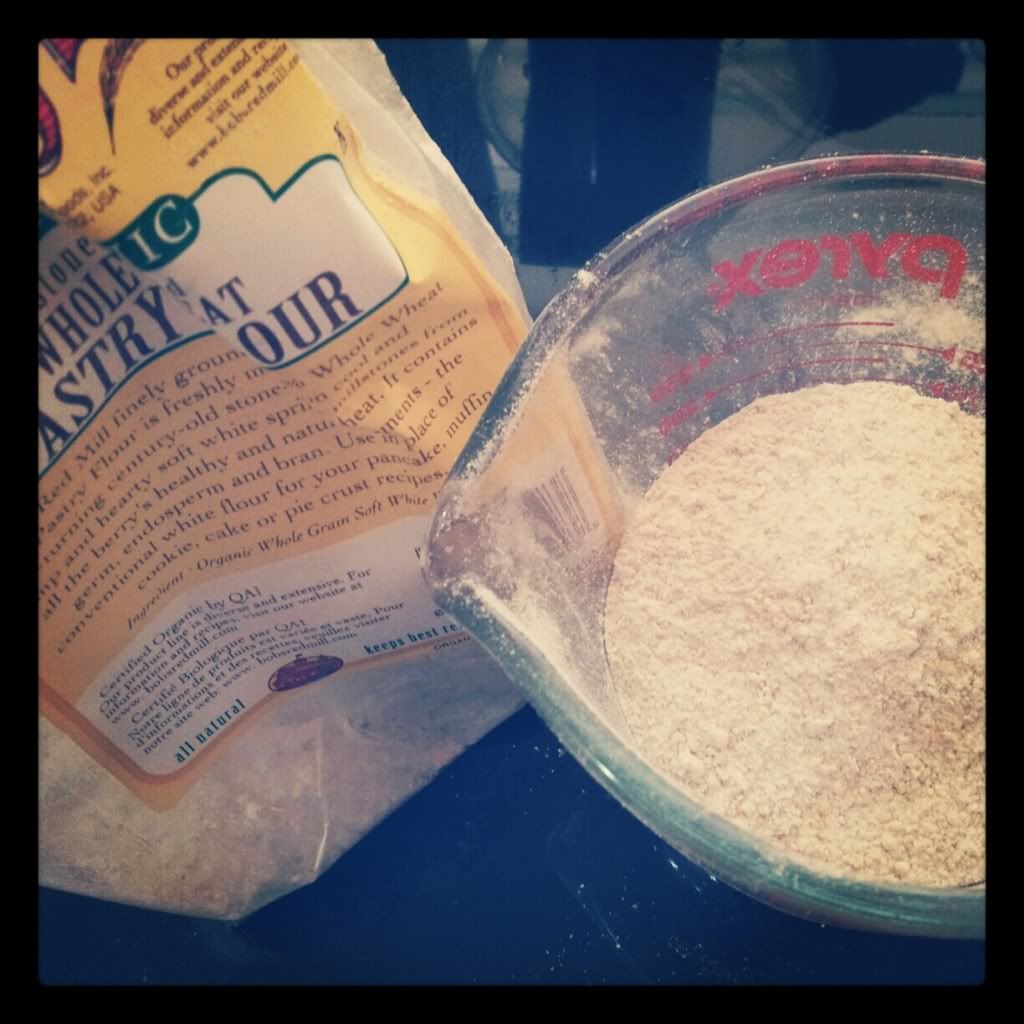
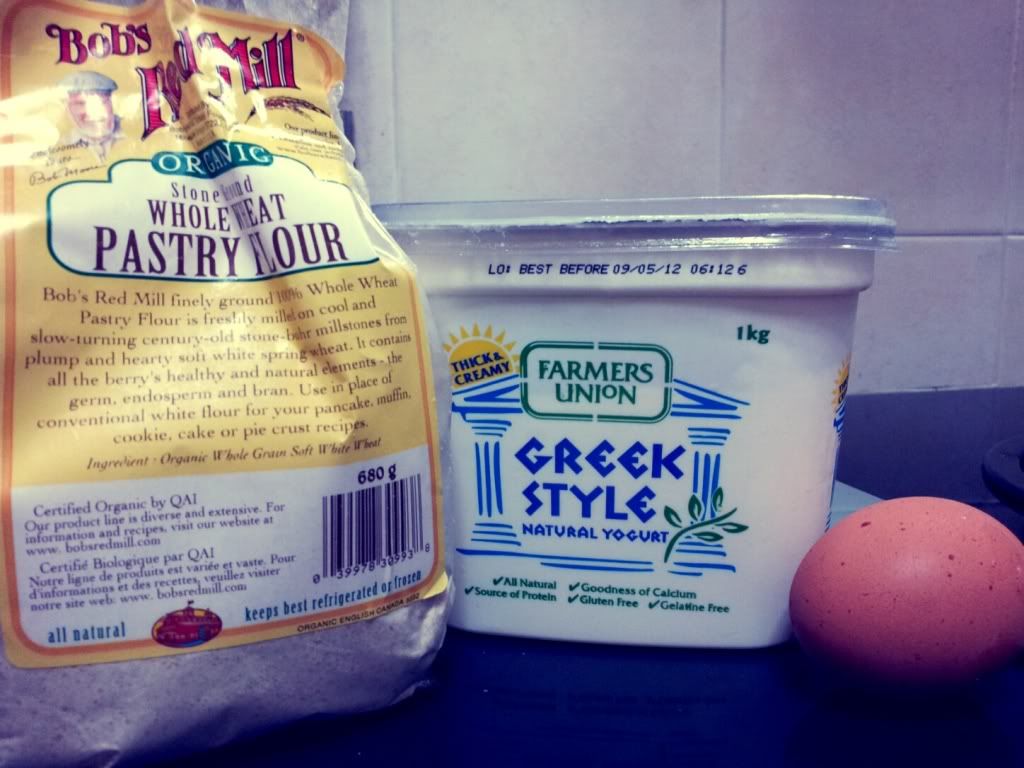
1/2 cup all-purpose flour  
1 tablespoon lemon zest  
1/4 cup butter  
1/3 cup granulated sugar for decoration

Directions:
Preheat oven to 375 degrees F (190 degrees C). Butter and flour 12 (3 inch) Madeleine molds; set aside. 
Melt butter and let cool to room temperature. 
In a small mixing bowl, beat eggs, vanilla and salt at high speed until light. 
Beating constantly, gradually add sugar; and continue beating at high speed until mixture is thick and pale and ribbons form in bowl when beaters are lifted, 5 to 10 minutes. 
Sift flour into egg mixture 1/3 at a time, gently folding after each addition. 
Add lemon zest and pour melted butter around edge of batter. Quickly but gently fold butter into batter. Spoon batter into molds; it will mound slightly above tops. 
Bake 14 to 17 minutes, or until cakes are golden and the tops spring back when gently pressed with your fingertip. 
Use the tip of the knife to loosen madeleines from pan; invert onto rack.
Immediately sprinkle warm cookies with granulated sugar.


Apparently, "successful" Madeleines will develop a characteristic bump at the bottom. I managed to get it using this recipe. If the little bumps are important to you, online recipes seem to recommend chilling the batter in the fridge plus freezing the Madeleine moulds. I kept the batter for about 30 mins in the fridge for the flavours to develop but I did not freeze the moulds.


A couple of variations that I did:
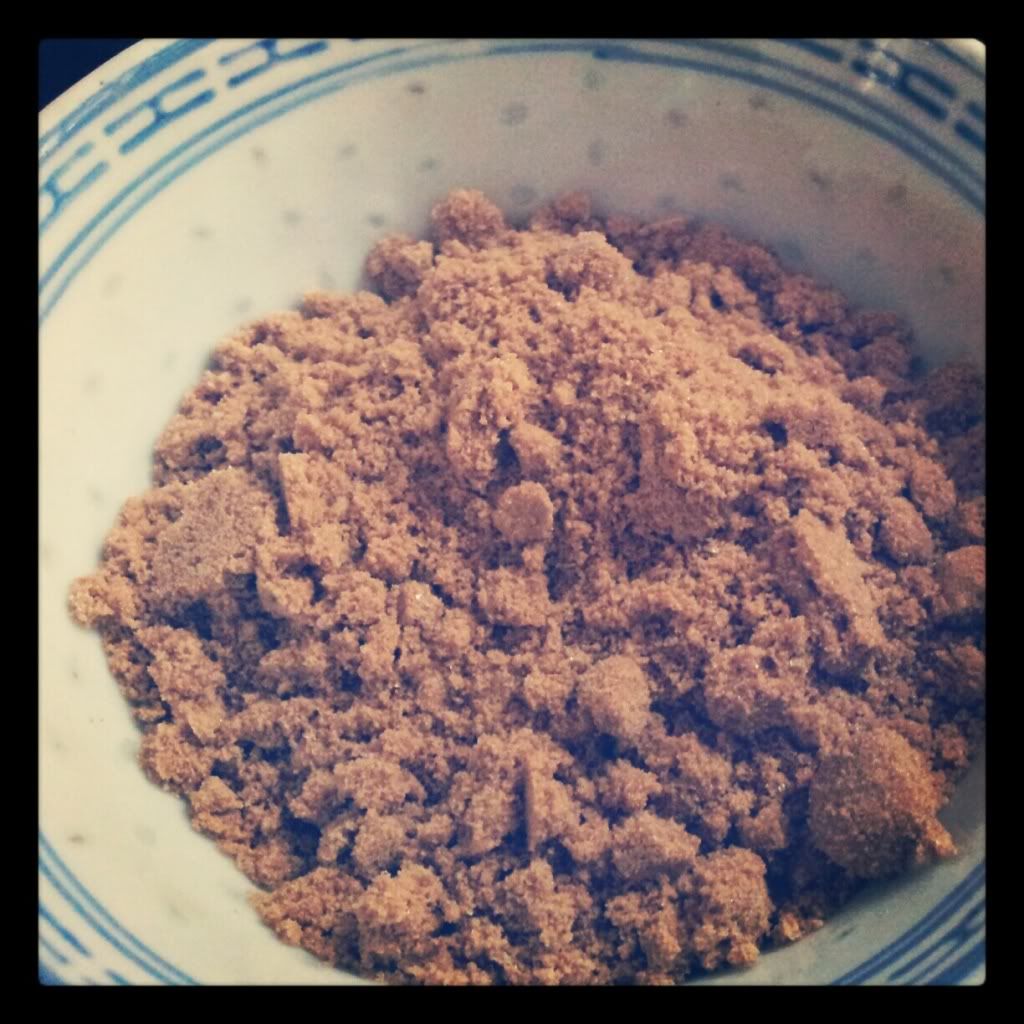
  •  Using molasses sugar instead of white sugar. These resulted in dark brown Madeleines but subsequently, fudgier and more moist.
  • Brown the butter - this makes for a richer taste - but be careful not to burn it!
  • I was lazy and skipped flouring the moulds though I did butter them thoroughly.
  • Also skipped sprinkling sugar over them at the end - Bubs doesn't need any reason to be more hyper
  • Planning to try lavender flavoured ones in the future. Infuse dried (edible) lavender into the melted butter for at least 15 mins, then strain out the butter.

Wednesday, November 26, 2014

Smitten Kitchen's Brownie Cookies

To be honest, I was skeptical when I saw this cookie recipe on Smitten Kitchen because I was wondering how good can this be when there are so few ingredients required and it was so simple? No out of the ordinary ingredients were required, no fancy smancy techniques either. Really?

Still, as both Hubs and Bubs love anything rich and chocolaty, I decided to give this a try.

Brownie Roll-Out Cookies*
Recipe from Deb’s mom
3 cups (375 grams) all-purpose flour
1/2 teaspoon (3 grams) salt
1/2 teaspoon baking powder
1 cup (225 grams) lightly salted butter, softened (Deb note: I don’t really see “lightly salted” much these days, so I used one stick salted, one stick unsalted)
1 1/2 (300 grams) cups sugar
2 large eggs
1 teaspoon (5 ml) vanilla extract
2/3 cup unsweetened cocoa (approximately 60 grams — weights can vary a bit depending on brand. I use the “good” stuff–Droste, Galler or Valrhona –but I can assure you that my mother only used Hershey’s growing up, so your choice)
Preheat oven at 350 degrees. Whisk dry flour, salt and baking powder in bowl and set aside. Mix butter, sugar, eggs, vanilla and cocoa in mixer. Gradually add flour mixture, and mix until smooth. Wrap in plastic and chill for at least one hour.
Roll out cookie dough on floured counter. Cut into desired shapes, brushing extra deposits of flour off the top. (It does disappear once baked, though, so don’t overly fret if they go into the oven looking white.) Bake on a parchment-lined baking sheet for 8 to 11 minutes (the former for 1/8-inch thick cookies, the latter for 1/4-inch cookies) until the edges are firm and the centers are slightly soft and puffed.
Transfer to a wire rack to cool.

A couple of changes (as always) I made:
  • Cut down the sugar to 1 1/4 cup as I usually find American dessert recipes too sweet. Substituted the butter to unsalted.
  • Used Dutch processed cocoa. This is near to impossible to find at supermarkets, even Cold Storage in Penang so I was lucky to find a baking supply shop that carries this (I Home at Tg Bungah) 
  • Under baking these gems is the key! I overbaked the first batches and they became like biscuits instead, crisp and brittle. If you prefer a soft, pillow-y texture, keep a careful eye on them in the oven and pull them out 1 - 2 mins ahead of time. They continue to harden whilst on the wire rack.
Bub's favourites all lined up: cookies, Lego minifigs and fruit. Nice way to spend the afternoon.


The cookies are intense with a rich, chocolaty taste and go down beautifully with a tall glass of cold milk. The toughest thing about this simple recipe is portion control - don't tell Hubs and Bubs that I hid them right at the back of the fridge :)

Friday, October 24, 2014

Chicken in Milk

When I chanced upon this recipe, my first thought was gross, chicken in milk? Blerggghh.
Then curiousity got the better of me, I started googling for reviews and all of the stellar blog posts convinced me to give this a try.

Jamie Oliver's recipe for Chicken in Milk below:

Ingredients:

  • 1.5 kg higher-welfare chicken
  • sea salt
  • freshly ground black pepper
  • olive oil
  • ½ stick cinnamon
  • 1 good handful fresh sage, leaves picked
  • zest of 2 lemons
  • 10 cloves garlic, skin left on
  • 565 ml milk

    Preheat the oven to 190°C/375°F/gas 5, and find a snug-fitting pot for the chicken. Season it generously all over, and fry it in a little olive oil, turning the chicken to get an even colour all over, until golden. Remove from the heat, put the chicken on a plate, and throw away the oil left in the pot. This will leave you with tasty sticky goodness at the bottom of the pan which will give you a lovely caramel flavour later on.

    Put your chicken back in the pot with the rest of the ingredients, and cook in the preheated oven for 1½ hours. Baste with the cooking juice when you remember. The lemon zest will sort of split the milk, making a sauce which is absolutely fantastic.

    To serve, pull the meat off the bones and divide it onto your plates. Spoon over plenty of juice and the little curds. Serve with wilted spinach or greens and some mashed potato.   


A couple of tips and tricks that I used based on reviews:
  • If you don't have cinnamon at home, you can skip it. Won't make a huge difference
  • Add in rosemary and thyme (as in the herbs, not the MAC eye kohl) 
  • The original recipe did not specify if the chicken was to be covered so I covered the pan with tin foil and then roasted it un-covered at the last 15 mins for a crispier chook. 

The first time I made it, I'd to hide the milk from Hubs who would have refused to even touch it as he has an aversion to what he terms as weird recipes. I only confessed to the milk when both Hubs and Bubs polished their plates clean. 

Bon appetit!

Saturday, October 11, 2014

Lasagne Cupcakes

Whilst Hubs loves lasagne, he hates making it for Bubs and me because we each have our own requirements. I hate mince on mine, Bubs insists on peas and Hubs crams as much vegetables as he can into each layer. At one point, we were splitting the loaf pan into 3 different sections and complained when each offending item crossed over. This post was genius and so popular, it has been on repeat at our home.


Yes, people, instead of a single lasagne, bake them in cupcake or muffin trays so you get to customise them. Garfield would have been so proud :)


You could substitute them lasagne sheets with spring roll wrappers. Cut them into circles or leave them as squares, it doesn't really matter. I personally like them as squares because the leftover edges at the sides get really crispy.


A very relieved Hubs layering the fillings for us. Bring on the cheese, babyyyyy!


I love the smaller portions as they somehow feel less heavy and you can easily freeze leftovers or bring them to the office.

Sunday, February 23, 2014

Chocolate Snack Cakes

As always, weekend afternoons are dedicated towards stockpiling the fridge with dessert for the week ahead.


Once Bubs is fast asleep, I give him a quick peck on his cheek and dash off to the kitchen where play time begins for me. He was upset before his afternoon nap because he decided he was Iron Man and leaped onto the bed without factoring the height of it. He fell right off backwards, hit his head against the floor (thank God the floor mat absorbed some of the impact) and bawled non stop.


Ignoring the fact that nearly everyone in the family is down with the flu, I decided upon Smitten Kitchen's chocolate yogurt snack cakes. After all, dark chocolate is packed full with antioxidants which will either kill or cure the flu bug, right?
 

I only had olive oil lying around the kitchen so I used that in place of vegetable oil. Since we usually use olive oil in stir fries and pasta, I've gotten used to the fruitiness of it and I can't really detect it in baked goods.


Melting the dark chocolate over a pot of boiling water on the stove. I was almost tempted to slurp from it. Almost.


Bliss is a cup of hot tea while the aroma of baked goodies waft out from the oven.

Chocolate Yogurt Snack Cakes

7 ounces (200 grams) bittersweet or semisweet chocolate, coarsely chopped
1/2 cup (125 ml) vegetable oil
1/2 cup (125 ml) plain, whole-milk yogurt
1 cup (200 grams) sugar
3 large eggs, at room temperature
1 teaspoon vanilla extract
1/2 teaspoon almond extract
1 1/2 cups (200 grams) flour
1 1/2 teaspoons baking powder
1/2 teaspoon coarse salt

1. Preheat the oven to 350°F (180°C). Line a 12-cup muffin tin with paper cupcake liners or lightly butter the pan. Or, if you’re Deb and have to be fancy dust off that much-neglected mini-springform pan and coat it with a nonstick spray.
2. In a heatproof bowl set over simmering water, melt the chocolate with 1/4 cup of the oil. Once melted and smooth, remove from the heat. (Alternately, you can do this in the microwave on high for 30 seconds, then in 15 second increments, stirring well between each until smooth.)
3. In another bowl, mix the remaining 1/4 cup oil with yogurt, sugar, eggs and vanilla and almond extracts.
4. In a large bowl, whisk the flour, baking powder, and salt. Make a well in the center of the flour mixture and pour in the yogurt mixture. Stir lightly a couple times, then add the melted chocolate and stir until just smooth.
5. Divide the batter among the muffin or springform cups and bake for 20 to 25 minutes (less for mini-springforms, more for muffins, though your oven may vary) or until they feel barely set in the middle and a tester or toothpick comes out clean.
6. Remove from the oven and cool on a wire rack before serving with coffee and a nice dollop of lightly sweetened whipped cream and any berries you can scrounge up in your fridge. Or, you know, as is.


It definitely brightened up someone's day when he woke up from his nap :)

Wednesday, April 3, 2013

Fool Proof Strawberry Jam

The idea of home made jam always brings forth to me images of hours spent bent over the stove top with hot bits of jam splashing at you. Doesn't sound like how I'd choose to spend my weekends. I was skeptical when this recipe promised that making strawberry jam wouldn't be as labourious as it sounded. I've made strawberry jam using the recipe a couple of times now and I'm pleased to say that it is fool proof and doesn't require the entire afternoon slaving over a hot stove.

I don't make huge quantities of this. I have no idea how to sterilise jam jars and the idea of having to chuck away all of them due to mold growing makes me queasy so I usually make enough to last us a week and refrigerate it covered.


You start out with luscious, fresh strawberries ... I've to swat Bubs's thieving little paws away from them otherwise I'll end up with no strawberries at all for the jam.


It's even harder to stop myself from pinching a few slices to nom on every now and then.


I'm really cheapskate old school and use a mortar and pestle to crush the berries. If you've a food processor, you could skip this step and give it a good whirl.


Add in sugar (I think the rule is equal amounts of sugar to the amount of strawberries that you are using) and since I'm sharing this with Bubs, I always use less sugar. Add in a nice squeeze of lemon (don't quote me on this but I think it adds a bit of pectin to it?) and bring to a rolling boil. I let it simmer for a while and then pour it into a bowl to chill in the fridge. Don't worry if it's runny. The jam will set after it cools down in the fridge.


It's not as thick as store bought jams but the flavour is so intense and rich. I'm not sure if mine is considered more of a strawberry coulis than an actual jam but this is mind blowing to be mixed into Greek yoghurt and fresh fruits. I've also paired it with plain cakes and Bubs can't get enough of this.

Wednesday, March 20, 2013

15 Min Dinner: Puff Pastry Pizza

At times when we're rushed for time, run out of food and don't want to resort to takeaway, we come up with puff pastry pizza.

It's one of the easiest things to whip up and oh so yummy.


My favourite toppings are cherry tomatoes, garlic, some rosemary and thyme grown on our balcony. And of course cheese, heaps of it ... mmmmm ... Bubs is picky and he only eats peas and cheese on his.


All ready to pop into the oven. You can easily guess which is Bub's pizza and which is ours ;)


After 10 - 15 minutes in the oven and sprinkled with some chilli flakes, ta-daaaaa, dinner is served :D It is lovely when served fresh from the oven, all crispy and flaky. Leftovers are great to be brought to the office for breakkie.

Friday, December 14, 2012

Egg Sandwich

I get stuck in a rut over cooking sometimes, it seems that recently, we're surviving on nothing more than pastas, roasts and porridge so I decided to try something different for a weekend brunch when I found this amazing recipe for an egg sandwich.


Forget about grating cheese. It's going to end up melted anyway, right? We had parmesan and mozzarella blocks in the fridge so that was sliced thinly.


An egg for each of us. Add a teaspoon of water to thin it out a little and beat the heck out of it. Bubs gets a kick watching us beat eggs and always begs to help. 


Pour out a little of the egg batter into a frying pan, as though you're making a thin crepe. Place the cheese in the centre, fold the egg around the cheese and cook. The photos in the recipe showed a beautifully folded egg parcel in the shape of a square. When I pointed this out to Hubs, he promptly used the spatula and cut out the sides of the eggs. Cheater!


Place the cooked egg-cheese-yumminess between slices of bread. Tadaaa, toddler approved quick lunch without any fuss. He looked at me as though I was the coolest mum on the earth to serve him bread for a meal :D

Saturday, October 27, 2012

Sweet Partings

It's been a week of partings. 

EL, my uni bestie, the girl that taught me how to walk in high heels, consoled me after each broken heart, sat next to me on a 9 hour long bus ride and kept laughing as we saw cow after cow, is moving back to Sydney with her husband and Little H :( I'm happy for their new start but will miss her terribly.


We dropped by to say good bye. Can't believe EL and I graduated at the same time, got married at the same time and had our kids within 6 months of each other.


Lil H enjoying her chauffeur driven ride ;)


At the workplace, it was L's last day at work and coincidentally, we were both wearing blue!

Sigh ......

It was the perfect excuse to bake some cookies just to cheer myself up ... and of course Bubs loved every single bit of cookie baking from helping me stir the batter to rushing me to bake them "faster, mummy" and then scoffing them down.

Molasses cookies are practically health food aren't they? I mean look at molasses, they're practically a superfood and spices are full of antioxidants.


I made a couple of variations: substituting ground cloves and ground ginger because each McCormick bottle would cost at least RM9 each (!) and I was more than happy to find this Mix Spice at Tesco for only RM5, yayyyyy! Also substituted margarine with butter (the holy grail of baked goods, mmm ...) and white sugar with brown sugar for a fudgier taste.


I usually get lazy when following recipes and omit steps on whims but pretty glad I followed this one: chill the dough in the fridge for at least an hour, roll them into balls and dip them in sugar. They resembled sugar crusted lumps of poo at this stage and I was wondering if they were even going to be edible :(


Voila! After 8 minutes in the oven, this was what greeted us - chewy, freshly baked molasses cookies. Bubs took 1 bite and gazed at me with his mummy-you-are-the-best look on his face. Totally worth the effort, I tell you ;)

Wednesday, June 20, 2012

What to do with Lemons


You could wear them ... I love how cheery this lemon yellow DVF Gap Kids t-shirt dress is! I initially wanted the blue one but my Mum said the Gap store in Singapore only had the yellow one left so she got this. She got confused at first when I asked her to go to Gap Kids to get me a dress, she was wondering why was I making Bubs wear a dress, LOL.


You could use them for the best brunch ever ... Rye toast with avocados, poached eggs and wasabi mayo. This has to be one of the quickest and healthiest brunch I've ever made.

Ingredients:
Lemon juice
Wasabi paste
Plain yogurt/cream
Avocado
Pepper
Toast

1. Poach eggs - this is the trickiest bit and mine were a total failure! 
2. Cut avocado in chunks, squeeze a dash of lemon & add pepper
3. Mix lemon juice, wasabi paste and yogurt (or if you're feeling decadent - cream)
4. Serve the eggs with wasabi mayo and arrange avocados on top of toast
5. Tuck in!

Saturday, June 2, 2012

Asos Arrives and Marmite Spaghetti

We've been having a crapola of a week with one mishap after another (driving around without air con in 30 degrees Celsius weather in traffic jams because the car's air con went bust, Bubs's mouth injury, borrowing Dad's car because the car was at the workshop and then accidentally drowning his car's remote in the washing machine ... to say the least)


Sooooo ....... I was totally over the moon when my Asos order finally arrived in the mailbox *woots* It's a French Connection rosehip/unicorn (sounds so much better than plain ol' maroon and white, doesn't it? :p) stripey T-shirt dress on sale. 

Kids of the 70s and 80s would remember growing up with Bovril (for those that eat beef) and Marmite. Usually our parents would mix it into hot rice porridge for that extra flavour, so there's a certain comfort along with nostalgia that comes with that salty, yeasty dark coloured paste. 

I was intrigued by this Nigella recipe that promised quick and easy comfort food with only 4 basic ingredients: Marmite, butter, spaghetti and cheese.


Sorry Antipodeans, Vegemite costs more than double so I went with Marmite instead. Interesting fact: Marmite and Bovril are stocked at the nutrition supplement section of Tesco.

Marmite spaghetti in a nutshell:

1. Cook spaghetti in salted water
2. In a separate small pot, melt a small amount of butter
3.  Mix a teaspoon (or more!) Marmite into the melted butter
4. Add in a bit of the pasta water to the Marmite butter mixture
5. Drain spaghetti and toss everything together
6. Serve with grated cheese


The verdict? Me likeyyyyy ... incredibly fast and simple and ooooh so good!

Hubs refused to touch it ("I'm not a Marmite kinda guy") and Bubs cautiously took a mouth but found it far too salty.

I finished the whole portion happily. Mmm ... Marmite :)

Tuesday, May 15, 2012

Mini Quiche Bites


I made Mini Quiche Bites for Bubs, wanting to break out from his usual pasta/porridge choices. He took one look at it while it was baking in the oven and was all excited, shouting "cookie". It did look a little like cookies from his toddler point of view, they were round, they were baking in the oven ... even though they weren't exactly sweet, these small quiches are perfect for a quick meal hot from the oven and an even better snack when they're cold from the fridge with a squirt of ketchup :)

No exact ingredients measurements because I went by gauging
To fill up a 12 hole muffin tray you'll need:
3 - 4 eggs
5 tablespoons of grated cheese (I went with Parmesan)
Puff pastry sheets
Dash of cream
1/2 cup chopped mushrooms
Few sprigs of fresh rosemary (chopped)
Pepper/salt (as needed)
Optional: diced streaky bacon for extra flavour

1. Oil the muffin tray very well (trust me on this)
2. Cut the puff pastry sheets to fit the inside of the muffin tray
3. Beat the eggs until smooth.
4. Add in cheese, cream, mushrooms, rosemary, bacon (if using), salt/pepper to the egg mixture and lightly beat to combine
5. Fill the muffin tray with the mixture
6. Bake approx at 180c for around 15 - 20 mins

Friday, May 4, 2012

Chocolate Soy Mousse

A long, long time ago, my parents would take my sister, brother and me to hotel buffet lunches every Sunday. It was our thing and a much anticipated one too. There would be dazzling arrays of dishes to choose from, white clad waiting staff that were friendly to us little kids and of course, the best part were the rows of scrumptious desserts.

Back in the 80s, the most sophisticated dessert I'd ever seen and tasted was chocolate mousse. I was amazed at how it looked like ice cream, tasted like ice cream but yet wasn't ice cream and didn't melt. And the name! Mousse! I kept calling it a chocolate mouse and when Mum corrected me, my 7 year old mind conjured up images of an edible chocolate moose.

So I got all nostalgic and reminiscing about my childhood dessert when I saw this post (recipe included) for an easy chocolate soy mousse that didn't require a lot of fancy ingredients.


Get a bar of chocolate ... I choose to be naughty and got a few more than the recipe recommended just for that extra chocolaty taste.


And a block of soft tofu. Yes, people, I go organic where possible.


Break the bar(s) of chocolate into chunks and melt them over a pot of boiling water.

Blend the uncooked tofu with the melted chocolate, chill and serve.


Tadaaa, instant chocolate soy mousse!

Sunday, April 22, 2012

Cup of Jo's Best Choc Chunk Cookies

I grew up in a very biscuit-y family. With 3 snack-loving children, there would always be different varieties of biscuits to tide us over until the next meal. In addition to the usual Jacobs crackers, there would be British Bourbon biscuit that were carefully rationed due to its "heatiness"properties, Dad loves his butter cookies and Arnotts assortments.

So I was more than excited when I found this Choc Chunk Cookie recipe on Cup of Jo
As always, I cannot stop tweaking recipes. There are the variations I made:
  • Changed the flour to pastry flour based on this recipe
  • Omitted the salt flakes
  • Refrigerated them for 24 hrs, because the NY Times said so 

I probably shouldn't have used 85% dark choc, the look I got from Hubs and La Petite's face when they first bit into it were hilarious! Bubs loved it though and kept wanting more "koo-kie"


When I first moved out, I instantly got a Pyrex measuring cup because it's what I've seen Mum use throughout the years


Lovely, almost fudge-y smell of the muscovado sugar


Freshly baked cookies - they look really uneven because I didn't had time to shape them out nicely. I initially used 2 spoons to shape them nicely then gave up


Recipe: Chewy Chocolate Chunk Cookies with Muscovado and Fleur de Sel
Makes 2 dozen cookies

If you don't have issues with gluten, you can use 8 ounces (230g) of all-purpose wheat flour in place of the gluten-free flours.

You'll need:
1 stick (110 g) unsalted butter, at room temperature
1/2 cup (100 g) packed light muscovado sugar
1/4 cup (50 g) natural cane sugar
1 teaspoon vanilla extract
1 egg, at room temperature
1 cup (140 g) brown rice flour
1/2 cup (60 g) amaranth flour
1/4 cup (30 g) tapioca starch
1/2 teaspoon fleur de sel, plus more for topping
1/4 teaspoon baking soda
1 cup (170 g) chocolate chunks or chips

1. In the bowl of a stand mixer, combine the butter, muscovado sugar, natural cane sugar and vanilla extract. Mix with the paddle attachment on medium speed for 2 minutes until light. Scrape the sides and bottom of the bowl. Add the egg and mix until combined.
2. In a small bowl, whisk together the brown rice flour, amaranth flour, tapioca starch, fleur de sel, and baking soda. Add the dry ingredients into the butter mixture and mix on medium speed until the dough comes together.
3. Add the chocolate chunks and mix until thoroughly incorporated.
4. Scoop the dough onto a piece of parchment paper. With the help of the parchment, roll the dough into a log that is approximately 2 inches in diameter and 12 inches long. Wrap the log with the parchment and refrigerate for 1 hour.
5. In this time, preheat the oven to 350F (180C). Cut the log into 1/2-inch disks. Place them on baking sheets lined with parchment paper or silicone mats leaving 2 inches in between the cookies.
6. Sprinkle the tops with a bit of fleur de sel. Bake for 11 to 12 minutes or until edges set and start to turn golden. They might look a bit underdone, but this is fine. They will harden as they cool and slightly under-baking them will keep them chewy and moist.
7. Let the cookies cool on the baking sheet for 5 minutes before trying to lift them. Store them in an airtight container for up to 3 days.

Sunday, April 15, 2012

Weekends are Meant For ...

Many years ago, a family friends once said "weekends will never be the same again once you start working full time". And it's true! There's nothing like 2 days of pure rest and sloth to recover from the hectic work week.

Weekends are the best time to experiment in the kitchen. We had this 1kg tub of Greek yoghurt in the fridge and I was intrigued by this pancake recipe. It made one of the best pancakes we've ever had - they were delightfully thick and moist, just the way I like my pancakes to be, not to mention incredibly simple to make.


Blueberry and Greek Yoghurt Pancakes (recipe from Apples Under My Bed)

Serves 2, makes 4 medium pancakes

Ingredients
1/2 cup Wholemeal Plain Flour
1/2 teaspoon Baking Soda
2 pinches of Salt
2 heaped teaspoons Brown Sugar
1 egg
5 heaped tablespoons Greek Yoghurt, plus extra for serving (I used Black Swan No-Fat Greek Yoghurt)
1 teaspoon Vanilla Extract
1-2 tablespoons Blueberries (depending on how berry-licious you like it), plus extra for serving - fresh or defrosted
Pure Maple Syrup, for serving
A squeeze of Lemon would also be lovely when serving

Method

1. Sift the flour, baking soda, salt and brown sugar in a medium bowl.
2. Whisk the egg in a small bowl and add it to the flour mixture, along with the Greek yoghurt and vanilla extract.
3. Fold the dry ingredients with the wet ingredients.
4. Add the blueberries and gently fold through a final time.
5. Heat two non-stick pans over low heat - if you don't have two pans simply use one pan to cook two pancakes at a time and keep the cooked pancakes warm on a plate by covering them with foil. Grease the pan lightly with margarine or butter.
6. Test whether the pan is hot by flicking a little water on it, if the water dances, the pan is ready.
7. Use a ladle to spoon the mixture into the pan to make 4 pancakes.
8. When bubbles appear on the surface of the pancakes and the bottom is golden, flip them - be careful, this is a moist mixture so they won't be well formed and will be a little tricky to flip perfectly.
9. Cook until golden, and serve with a spoon of Greek yoghurt, extra blueberries and a drizzle of maple syrup.


I omitted blueberries and maple syrup because I didn't have them on hand but Bubs went crazy over them when served with a dab of honey and fresh bananas. He kept saying "more" repeatedly. That's his little baby fist shaking very determinedly at them.


Hubs preferred his sweetened with jam.

Nothing burns off a toddler's energy more than a long romp around the neighbourhood. Bubs's snazzy green slip ons vs my trusty black Birks which have seen me throughout pregnancy.

Bubs examining the road and jabbing at it with his stick.

Sunday, March 25, 2012

Lactation Cookies

Boy, does the name and concept of this sound weird or what? I first found this recipe on a mum's forum and was swayed by all the positive reviews for it. The brewer's yeast, flax seed meal and oats are supposed to boost milk supply for breastfeeding mamas but all in all, if you disregard the choc chips and reduced the sugar, it's quite a healthy cookie recipe and I had no qualms feeding it to Bubs.

Don't let the long list of ingredients daunt you and even though brewer's yeast smells (and probably tastes) foul, be generous with it as the rest of the ingredients will mask the taste. 


What I did differently:
  • It sounded like way too much sugar so I cut down sugar to 1/2 cup brown sugar + 1/2  molasses. You'll be getting most of the sweetness from the choc chips anyway.
  • Ran out of oats so I used 2 cups oats + 1 cup barley flakes
  • Used whole flax seed instead of flax seed meal because I didn't have that on hand
What I shall do the next time upon Hubs request:
  • Separate the batter to make his portion with chopped nuts and choc chips only
  • Bubs portion will be oat/barley flakes with raisins 
Not too sure if these had a lactating effect but the flavours of the brown sugar, molasses, brewers yeast and choc chips all went wonderfully and it had a bit of a fudgy texture.


1 cup butter
1 cup sugar
1 cup firmly packed brown sugar
4 tablespoons water
2 tablespoons flax seed meal
2 eggs
1 teaspoon vanilla
2 cups flour
1 teaspoon baking soda
1 teaspoon salt
3 cups oats
1 cup chocolate chips
2 -4 tablespoons brewer's yeast

Directions:

1
Preheat oven to 350°.
2
Mix the flaxseed meal and water and let sit for 3-5 minutes.
3
Beat butter, sugar, and brown sugar well.
4
Add eggs and mix well.
5
Add flaxseed mix and vanilla, beat well.
6
Sift together flour, brewers yeast, baking soda, and salt.
7
Add dry ingredients to butter mix.
8
Stir in oats and chips.
9
Scoop onto baking sheet.
10
Bake for 12 minutes.
11
Let set for a couple minutes then remove from tray.

Sunday, March 11, 2012

Easy Focaccia

I was intimidated by bread recipes after hearing stories about the dough not rising or turning out as hard as rocks that the ducks wouldn't even eat them. After googling for fail proof recipes, I found this really easy one and it worked!

I added fresh rosemary, thyme, oregano and grated cheese to it.


Ingredients

  • 1 teaspoon white sugar
  • 1 (.25 ounce) package active dry yeast
  • 1/3 cup warm water (110 degrees F/45 degrees C)
  • 2 cups all-purpose flour
  • 2 tablespoons olive oil
  • 1/4 teaspoon salt

Directions

  1. In a small bowl, dissolve sugar and yeast in warm water. Let stand until creamy, about 10 minutes.
  2. In a large bowl, combine the yeast mixture with flour; stir well to combine. Stir in additional water, 1 tablespoon at a time, until all of the flour is absorbed. When the dough has pulled together, turn it out onto a lightly floured surface and knead briefly for about 1 minute.
  3. Lightly oil a large bowl, place the dough in the bowl and turn to coat with oil. Cover with a damp cloth and let rise in a warm place until doubled in volume, about 30 minutes.
  4. Preheat oven to 475 degrees F (245 degrees C).
  5. Deflate the dough and turn it out onto a lightly floured surface; knead briefly. Pat or roll the dough into a sheet and place on a lightly greased baking sheet. Brush the dough with oil and sprinkle with salt.
  6. Bake focaccia in preheated oven for 10 to 20 minutes, depending on desired crispness. If you like it moist and fluffy, then you'll have to wait just about 10 minutes. If you like it crunchier and darker in the outside, you may have to wait 20 minutes.

Tuesday, March 6, 2012

Stormy Rainy Nights call for

Lots of food, food and more food!

The weather has been erratic for the past few days: scorching sunny days and thunderstorms filled nights. Whenever the temperatures drop (albeit just a few measly degrees), my favourite thing to do is eat lots of hot, hot food. Think fiery tom yum, boiling hot steamboat and charcoal grilled BBQs.


We love going to Daorae for Korean BBQ, slightly on the pricey side (RM5 for a bowl of plain white rice!) but the choices and endless refills of side dishes make up for it. Sometimes they give out complimentary bowls of steamed eggs or mini pancakes for selected tables. If you're going there during dinners, keep an eye out for the Korean manager on duty ;) He's super friendly and so many girls think that he's cute beyond words.


When it's raining cats and dogs, I like making hot desserts. I'd a lot of paradise mini pears on hand and decided to bake them with a dab of honey and chopped rosemary. You usually think of savoury and not sweets with rosemary but these are fabulous with honey and pears, it takes the sweetness down a notch and adds a herb-y scent. Eat as is or serve with vanilla ice cream/plain yogurt.


And when it's nice and sunny out there, it's the best time for an ice cream waffles and a rootbeer float at A&W. Before Bubs came along, we used to go to A&W religiously every weekend for these.


I got that Holden tee from Sydney for my nephew 8 years ago when I heard my sister was expecting. After that I forgot all about it until Aunt D gave me a whole box full of old clothes that T has outgrown. I was so excited to see that old Holden tee again!

Saturday, February 18, 2012

Trying Out Rainbow Cake in a Jar

I was inspired by the idea of baking in jars after reading this blog post and decided to give the rainbow cake in a jar a go.

Rainbow Cake in Jar
  • 1 box white cake mix made according to package instructions
  • Neon food coloring in pink, yellow, green, turquoise, and purple
  • 3 one-pint canning jars
  • 1 can vanilla frosting
  • Rainbow sprinkles
Preheat oven to 350 degrees. Thoroughly wash and dry the inside of each canning jar. Spray the inside of each jar thoroughly with nonstick cooking spray. Set aside.
Scoop about 1/2 cups of cake batter into five small bowls. It doesn’t have to be perfect, don’t panic if you get a little more of less of one color than another.  Tint each bowl of cake batter with the food coloring until very vibrant.
Spoon about 3 tablespoons of the purple batter into the bottom of each jar.  Spoon equal amounts of turquoise batter, then green, yellow, and pink.  Place the jars in a shallow baking dish, add about 1/4″ in water in the baking dish. Place the baking dish in the oven and bake for 30-35 minutes.


I used AmeriColor gels and didn't realised that I should have gotten primary colours so I could have done more colours.


It was nerve wrecking trying to layer the coloured batter layer by layer. I was so nervous that it'd all get mixed up. These kind of remind me of those coloured sand in jars that was popular a few years back.


I was really surprised the glass jars didn't crack during baking in the oven. Can't wait to try more baking in jars!
Related Posts Plugin for WordPress, Blogger...